
AIRODUMP-NG: A BEGINNER'S GUIDE TO PACKET SNIFFING.
- Apr 30, 2023
- 4 min read
In this blog, we will start the pre-connection attack section and learn all about packet sniffing.
WHAT DOES THIS INCLUDE?
INTRODUCTION
In this blog, we will start the pre-connection attack section and learn about the famous airodump-ng. By the end of this blog, you will have all the knowledge you need about airodump-ng and the basics of packet sniffing.
Monitor Mode v/s Managed Mode
Managed Mode: When an interface is set to managed mode, it will only accept and capture packets that have the same destination MAC address as that device. This is the default mode for most wireless adapters. Monitor Mode: When an interface mode is set to monitor, it captures all the packets and traffic received on the wireless channel. NOTE: To continue further with this section, you should have a wireless card that supports monitor mode and packet injection.
How do I check and change the mode of my Wi-Fi adapter in Kali Linux?
To check the mode of your Wi-Fi adapter, type the following code: iwconfig
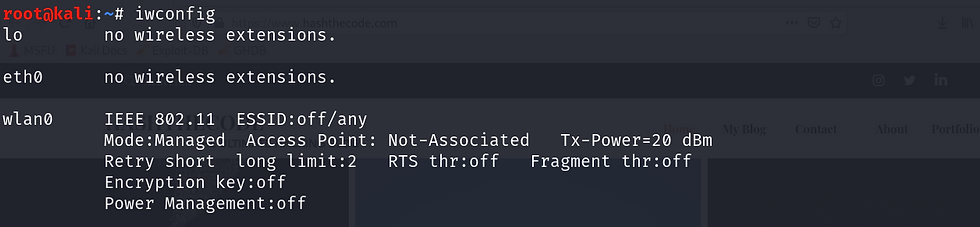
As you can see, my Wi-Fi adapter is set to “managed mode.” Let us change it to monitor. To set the mode to monitor, follow the steps: Step 1: First, we need to disable the Wi-Fi adapter. To disable it, enter the following code: ifconfig [interface name] down ifconfig wlan0 down Step 2: This step is suggested but not required. The following code will ensure that any process that can interfere with the next steps is stopped. airmon-ng check kill. Step 3: Now, we need to change the mode to "monitor." Execute the following code: iwconfig [interface name] mode monitor iwconfig wlan0 mode monitor Step 4: Now, to enable the network interface, execute the following command: ifconfig [interface name] up
ifconfig wlan0 up

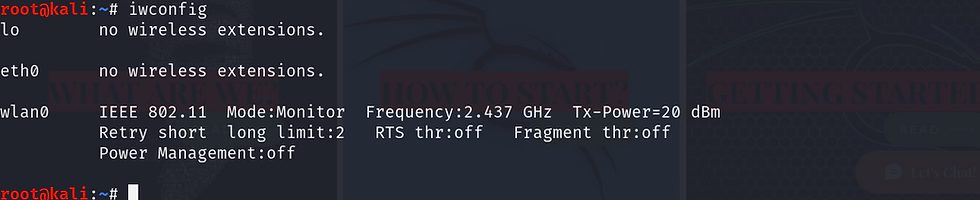
Step 5: To check the mode, enter the following command: iwconfig
AIRODUMP-NG
Airodump-ng is a packet sniffer that captures all packets that are in range and displays detailed information about the network around us. Airodump-ng is part of the Aircrack-ng suite.
To start sniffing the packets, execute the following command:
airodump-ng [monitor mode interface]
airodump-ng wlan0
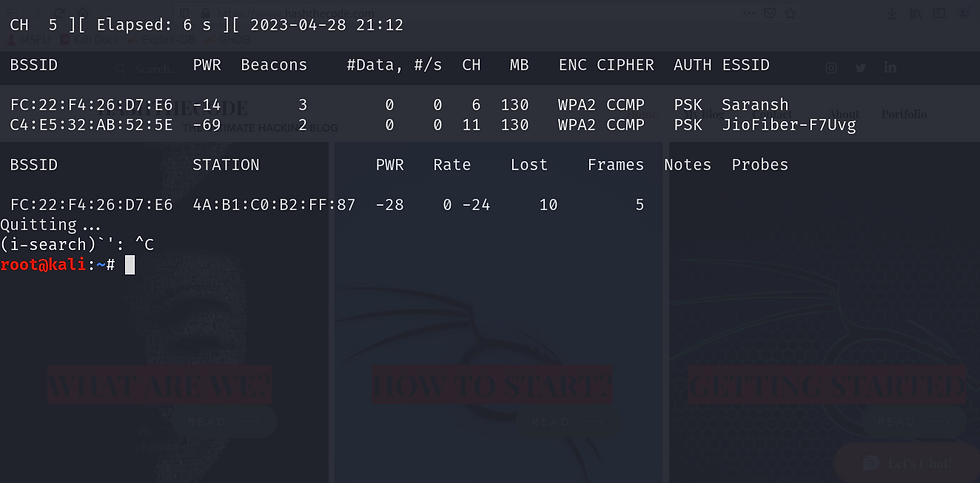
You will see something like this.
To quit the process press ctrl+c.
ANALYZING THE TERMS
Bssid: By looking at this, you may have guessed what it is. It is the Mac address of the access points near you.
Pwr: This field denotes the strength of the signal around you. The more positive the number, the better it is.
Beacons: Beacons are the frames that every network around you sends (even if it's hidden) to broadcast its existence.
# s/: It is the count of the number of data packets we collected in the past 10 seconds.
CH: It is the channel on which the network works.
MB: This field displays the maximum data transfer speed that the network can support.
Enc: This denotes the type of encryption used by the network.
Cipher: It is the cipher used to encrypt the password of the network. Read more here.
Auth: This is the type of authentication used to verify the authenticity of a device when it tries to connect to the network. Read more here.
TARGETED PACKET SNIFFING
So far, we have run airodump-ng against all the networks in our range. But if we want to target and break into a specific network, then we need to run it against that network.
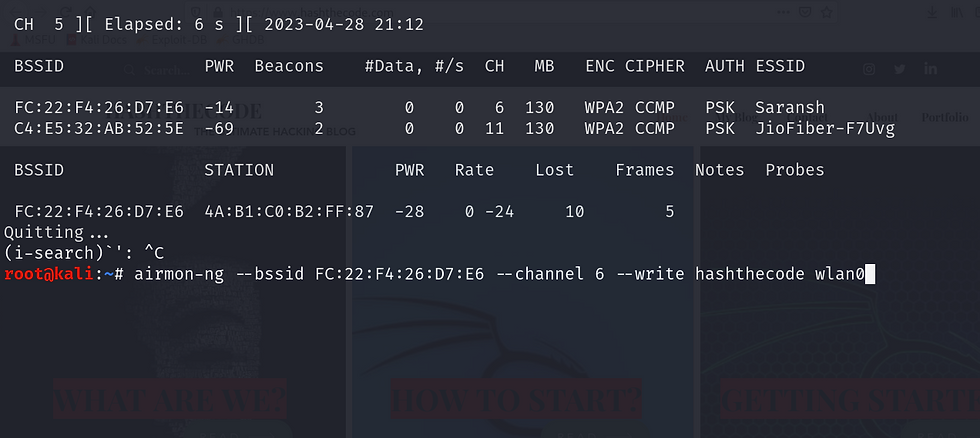
To use airodump-ng for targeted packet sniffing, use the following code:
airodump-ng --bssid [target bssid] --channel [channel of the network] --write [file name] [interface in monitor mode]
airodump-ng --bssid FC:22:F4:26:D7:E6 --channel 6 write hashthecode wlan0
EXPLANATION OF PARAMETERS
We have passed three parameters to airodump-ng. An explanation of each parameter is given below:
--bssid: This parameter is used to specify the bssid of the access point. This parameter is mandatory for target packet sniffing.
--channel: This parameter accepts the channel on which the network is running.
We will get these two pieces of information while running airodump-ng against all the networks.
--write: This parameter is optional but recommended. It will store all the information about the packets in the file name that you have specified.
You will get the following result:

For more parameters of airodump-ng visit here
WHAT DO DIFFERENT TERMINOLOGIES MEAN?
There are a few new terminologies that you need to understand here.
Station: This column contains the MAC address of the connected clients to the access point.
Rate: It is the speed of data transfer between that client and the access point.
Lost: This is the number of packets lost while capturing packets in airodump-ng.
Frames: This is the number of packets that we have captured during the whole session.
Probes: If a device is still trying to connect to the access point, this field will show it.
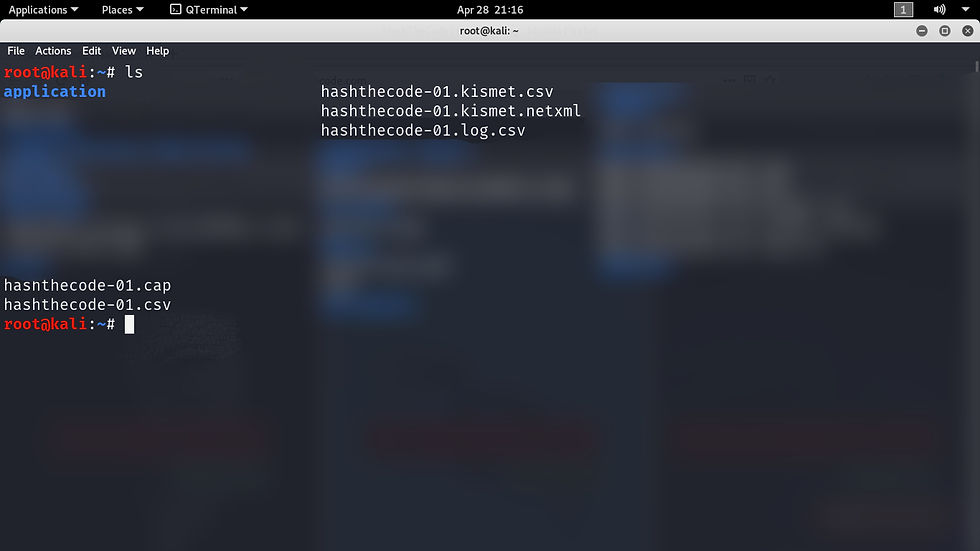
These are all the files we captured using the --write parameter.
USING WIRESHARK TO ANALYSE THE PACKETS
So far, we have captured the data packets and stored them in our system using the --write command.
Now we need to analyze it using a tool called Wireshark.
Wireshark:
Wireshark is an application that captures packets and is useful for analyzing them. It is the most widely used tool across the globe for packet analysis. For more information on Wireshark, Read Here.
We will use Wireshark in detail throughout the network hacking section. As far as this blog is concerned, we will only look at the basics.
To open Wireshark, type "Wireshark" in the shell and hit enter.
To open the packets that we just saved, follow the steps:
Go to File>Open>. Click on a file ending with the.cap extension and hit enter.
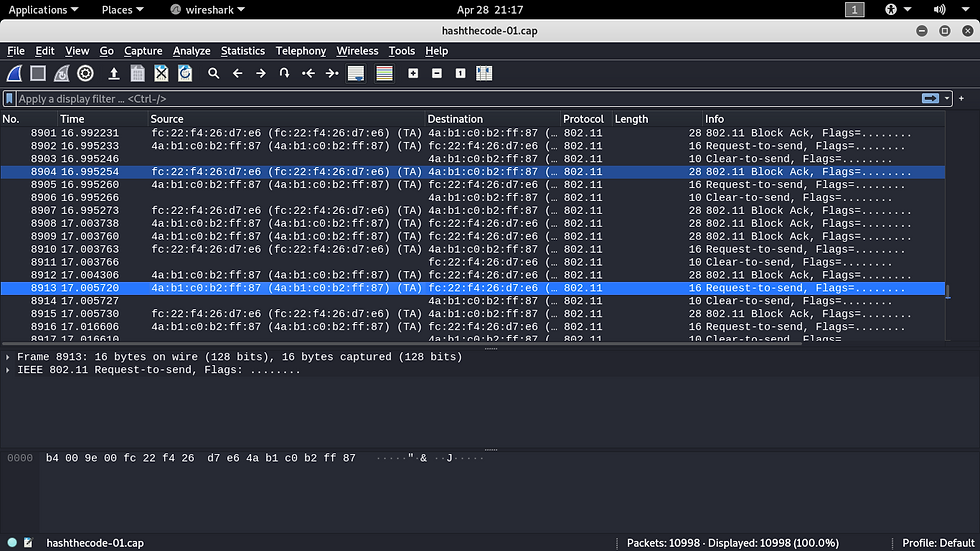
Now, the first word that you may want to say (except the f-word) is “gibberish." Yes, it is gibberish because the packets that we have captured are all encrypted. If the network were not encrypted, then you would be able to see all the information that took place over the network in plain text.
But our efforts are not in vain. If we can somehow break into the network and capture the encryption key, then we will be able to see all the data in plain text. In the next blog, we will use a de-authentication attack to disconnect the client from the network and capture the 4-way handshake. We will then try to break the encryption and gain the encryption key.
STAY TUNED
HAPPY HACKING :)


Comments